The Luna I quest, The Mirrors, the Maze, and the Tsar, twists every rule of exploration Genshin Impact players know. Shifting reflections, hidden corridors, and a ruler whose motives shimmer like glass-this guide breaks down each puzzle and secret to help you outsmart the maze itself.
The quest is fairly simple overall, but the final fight can be tricky for many players. So, follow our The Mirrors, the Maze, and the Tsar quest guide in Genshin Impact to avoid every obstacle.
How to Start The Mirrors, the Maze, and the Tsar Quest in Genshin Impact
To begin The Mirrors, the Maze, and the Tsar quest in Genshin Impact, players must first complete the “Luna I: Curtain of Reflection” quest to trigger the new storyline. After meeting the conditions, head to the designated quest marker in the Court of Fontaine and interact with the NPC indicated in the Quest Menu. Accept the prompt to begin, and a short cutscene will introduce the setting and the first objective. Make sure your party includes characters suited for puzzle-solving and combat, as the quest features both exploration and challenging encounters.
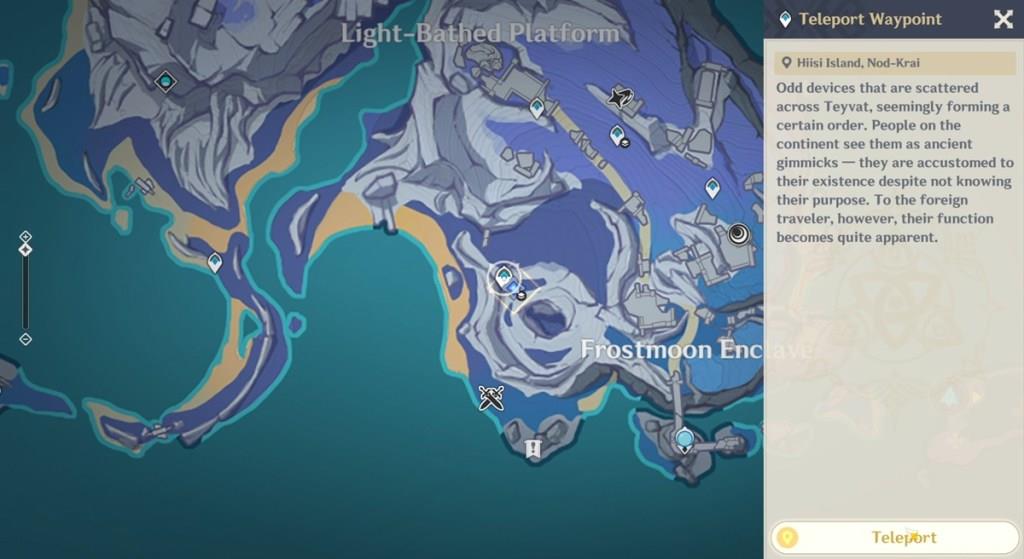
The Mirrors, the Maze, and the Tsar quest can be started by visiting Frostmoon Enclave and jumping into the huge opening on the ground west of the meeting point. There will be a Teleport Point nearby to help you find the location. Jump into the crater to find Maite and start the quest. This quest is also connected to finding one of Nod-Krai’s Local Legends- Crab Tsar.
How to Complete The Mirrors, the Maze, and the Tsar Quest in Genshin Impact
The Mirrors, the Maze, and the Tsar quest requires careful observation and puzzle-solving to progress smoothly. Begin by examining each mirror’s angle to redirect the light correctly and reveal hidden mechanisms. In the maze section, follow the elemental traces and adjust the rotating walls to open new passages. During the encounter with the Tsar, manage your party’s shields and timing to counter his powerful strikes while watching for cues that signal phase changes. Completing these parts rewards valuable materials and insight into the Luna I storyline.
The Mirrors, the Maze, and the Tsar quest is divided into multiple small sub-quests:
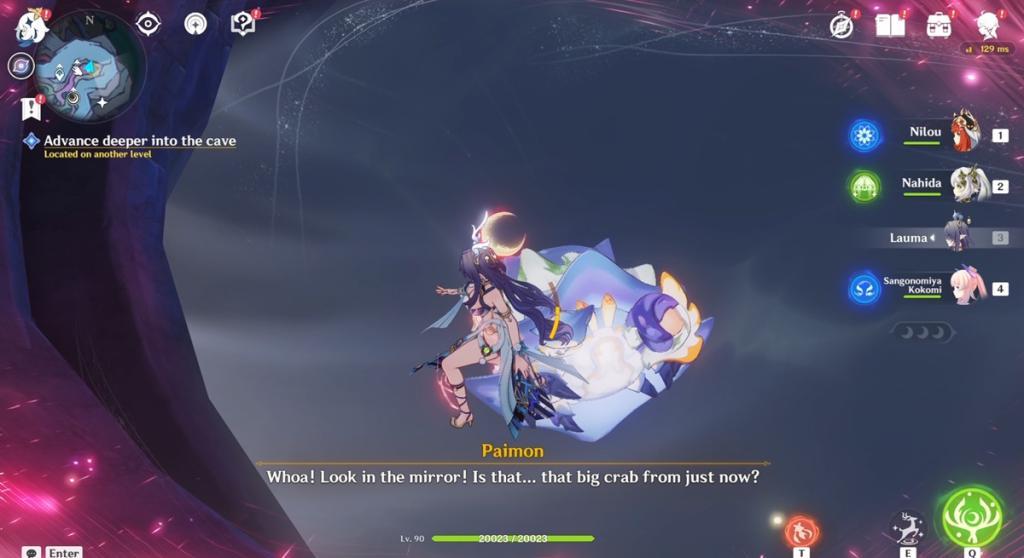
- Advance Deeper into the Cave
- Catch up to the Crab Tsar
- Destroy the Obstacles
- Search for traces of the Crab Tsar
- Advance deeper into the cave
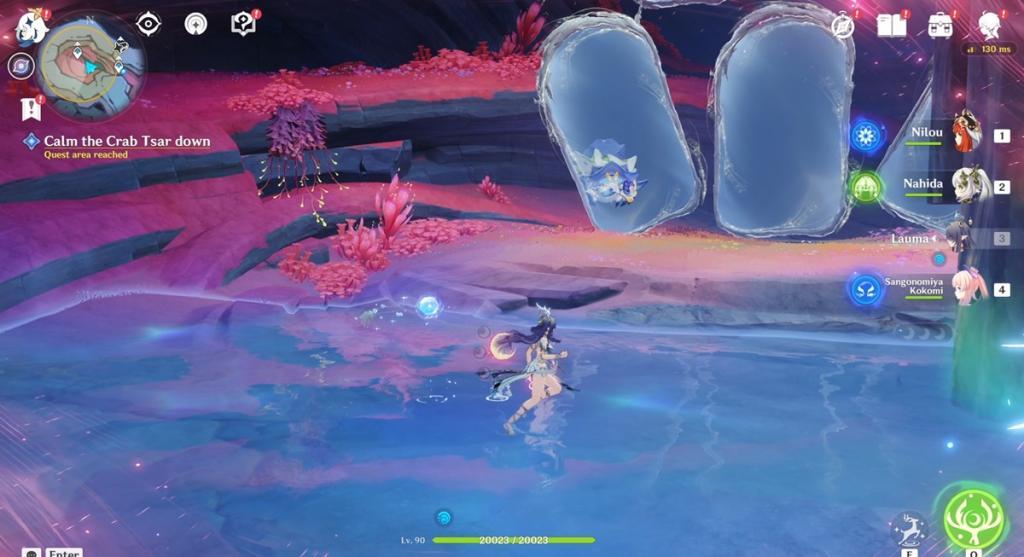
- Calm the Crab Tsar down
The following section has guides for each of the sub-quests in The Mirrors, the Maze, and the Tsar questline.
1. Advance Deeper into the Cave
After you speak with Maite, the first thing you will need to do is go deeper into the cave. Eventually, you will come across the Crab Tsar, who will block your way with pillars. Use the power of Kuuvhaki to break the pillars and advance.
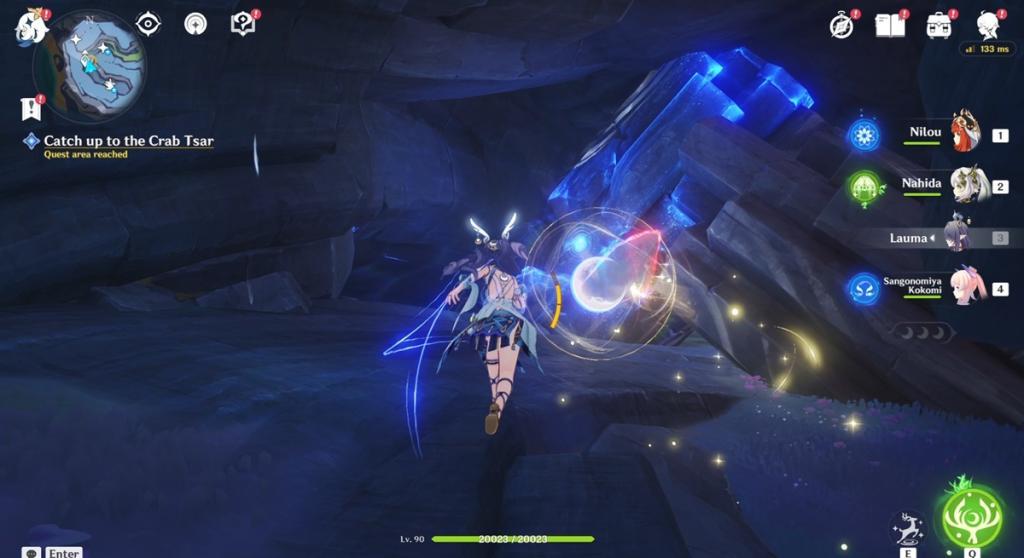
2. Catch up to the Crab Tsar and Destroy the Obstacles
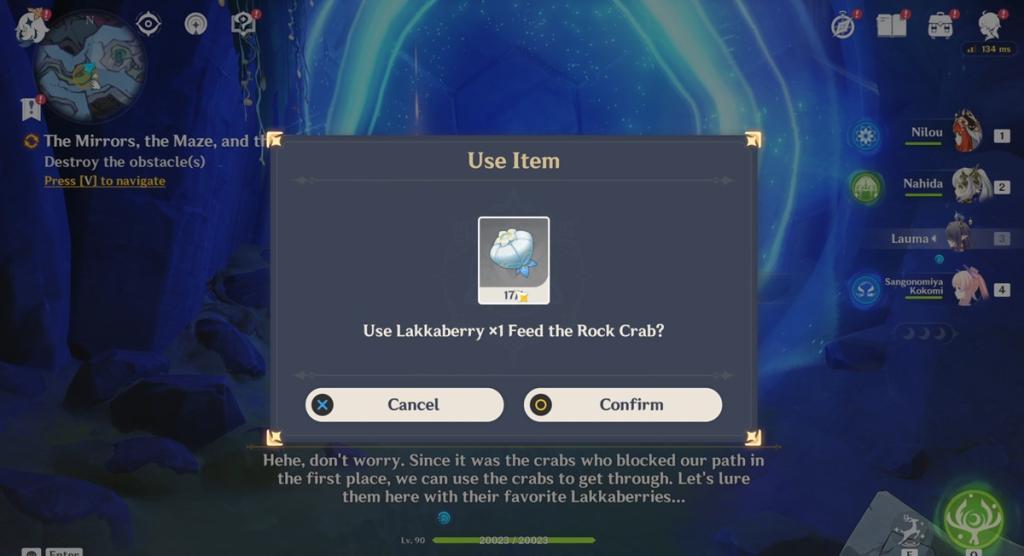
Next, you have to continue heading deep into the cave, following the path of Crab Tsar. Keep going until you reach a dead-end with a small crab near it. Here, you will have to place a Lakkaberry on the ground to feed the Crab and break the shield blocking your way.
Lakkaberry can be found inside the cave or above. You will need more in the Nod-Krai map region, so make sure to collect a bunch before heading inside.
Now, you will find similar obstacles along the way and have to use the crabs located there to open the way forward.
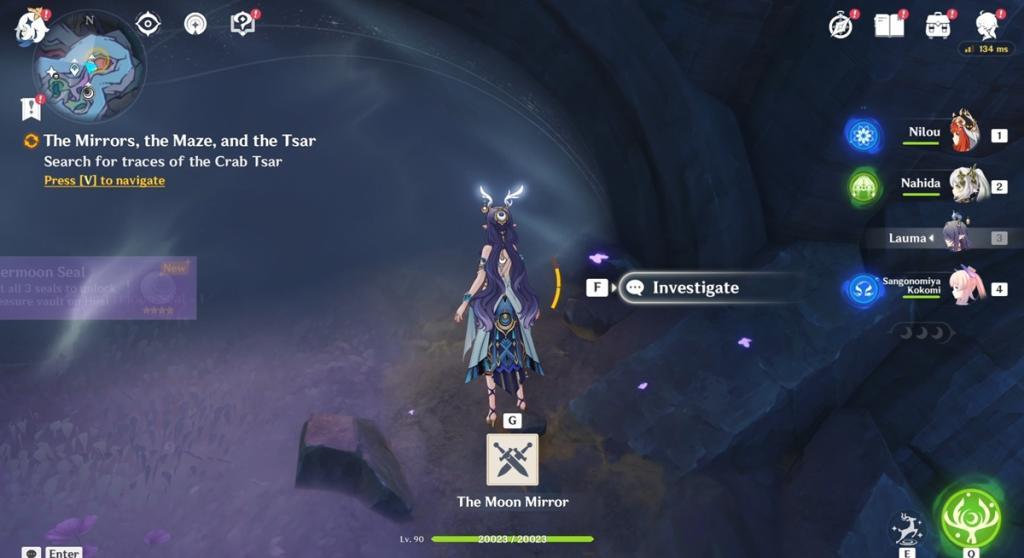
3. Search for Traces of the Crab Tsar
Head to the next area and look around until you get the Investigate option on your screen. This place will be blocked by mirrors without a clear way forward. A cutscene will start where someone from the Frostmoon Scions will appear and speak with Maite and the traveler.
4. Advance deeper into the Cave
After the conversation ends, head into the cave and look for a glass on the ground with the Crab Tsar’s image. Stand on top of it to break the glass and head underground. Now keep going deeper, eventually using the Kuuvhanki lines to ascend into the next area. You will eventually come across the Crab Tsar, where you will have to calm it down.
5. Calm the Crab Tsar Down
Now, you will have to confront the Crab Tsar and calm it down by beating it at its own game. A traditional combat won’t work here, as the fight uses gimmicks instead. The Crab Tsar will hide inside mirrors while lifting stone pillars at you.
Avoid the stone pillars rising from the ground, and eventually, you will get an option to break the pillars using Kuuvhaki. Break the pillars, and then a crab will rise with a Kuuvhaki detonation bomb. Press ‘T’ to pick up the bomb and throw it at the mirror with the Crab Tsar.
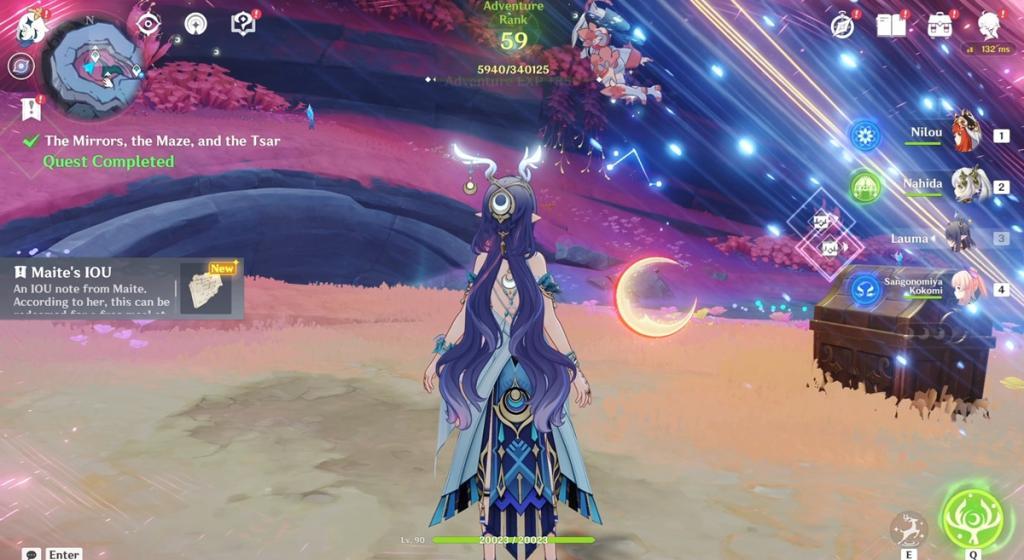
Once you do that, the Crab Tsar boss will create more mirrors and increase his attack speed. With more mirrors, you will have to track the Crab Tsar before attacking it. Continue doing the above strategy for five more turns to complete the battle. After that, a cutscene will start, and the mission will be completed.
The Mirrors, the Maze, and the Tsar Quest Rewards
The Mirrors, the Maze, and the Tsar Quest Rewards dives into the twists of exploration, detailing the rewards you can earn as you navigate shifting reflections and intricate pathways.
After you complete The Mirrors, the Maze, and the Tsar Quest, you will get the following rewards:
- Maite’s IOU
- Maite’s Notes
- 40x Primogems
- 4x Hero’s Wit
- 2x Precious Chest
- 1x Luxury Chest
- Adventure EXP
- Mora
Best team comp for Crab Tsar fight
The Crab Tsar fight in Genshin Impact’s “The Mirrors, the Maze, and the Tsar” requires teams that trigger Bloom, Hyperbloom, Burgeon, or Lunar-Bloom reactions to break its Stoneborne Seeds effectively. Lunar-Bloom teams with Lauma excel due to the boss’s vulnerability, while Hyperbloom offers strong alternatives for consistent damage.
Top Team Composition
This setup maximizes Lunar-Bloom damage output against the seeds and mirrors.
| Role | Character | Key Role |
|---|---|---|
| Main DPS | Nilou | Hydro enabler, Bloom cores |
| Support | Lauma | Lunar-Bloom trigger, CRIT |
| Sub-DPS | Nahida | Dendro applicator, EM buff |
| Healer | Kokomi | Hydro sustain, healing |
Rotate Nilou’s Bloom setup into Lauma’s bursts for quick seed destruction across phases.
Alternative Teams
Hyperbloom teams handle seeds reliably without Lauma.
-
Raiden Hyperbloom: Raiden Shogun (DPS), Nahida (Dendro), Kazuha (grouping), Kokomi (Hydro). Triggers off-field Hyperbloom with Raiden’s energy.
-
Alhaitham Hyperbloom: Alhaitham (DPS), Nahida (Dendro), Xingqiu (Hydro), Kuki Shinobu (shielding). Manages Dendro overvape for veterans.
-
F2P Bloom: Collei (Dendro), Xingqiu (Hydro), Nahida (Dendro core), Kazuha (VV shred). Focuses on constant core generation.
Fight Tips
Prioritize Hydro + Dendro for Bloom seeds, dodging pillars and throwing Kuuvhaki bombs at the real Tsar in mirrors. Lauma teams clear fastest on higher difficulties.
Which characters can trigger Lunar-Bloom reliably
Lauma, Nefer, and Columbina reliably trigger Lunar-Bloom through their specific talents that convert standard Bloom reactions into this enhanced Dendro-Hydro variant. These characters enable Lunar-Bloom when a party member applies the opposite element (Dendro or Hydro) to an affected enemy, scaling damage with their Elemental Mastery or HP stats.
Primary Triggers
Lauma stands out as the core enabler for Lunar-Bloom teams due to her kit’s focus on the reaction.
-
Lauma (5-star Dendro): Her Nature’s Chorus passive converts Bloom to Lunar-Bloom, boosting base DMG by up to 14% via EM; her Skill consumes Verdant Dew for direct Lunar-Bloom instances.
-
Nefer (Dendro): Dusklit Eaves passive enables conversion with EM scaling; her Skill’s Phantasm Performance consumes Verdant Dew for shade-based Lunar-Bloom DMG.
-
Columbina (Hydro): Moonlight, Lent Unto You passive transforms Bloom into Lunar-Bloom, increasing DMG via her Max HP (up to 7% bonus).
Usage Notes
Nilou pairs exceptionally with these triggers in Bloom-heavy teams, as her Bountiful Cores become crit-capable Lunar variants at C0. Baizhu provides minor Lunar-Bloom buffs through his ascension passive.