Fuel is the heartbeat of every run in Dead Rails, yet many players waste it without realizing how mechanics truly work. Here’s how to get fuel fast, manage it smartly, and keep your train running longer in Roblox’s most mechanical survival challenge.
However, if you don’t know what you’re looking for, it can get really difficult to reach the last checkpoint, leaving aside managing your cash for buying other essentials. So, if you’re facing trouble and want to understand what can be used as fuel and how to optimize it, this one’s for you. Keep reading as we explain fuel in Dead Rails right here.
What is Fuel in Dead Rails
Fuel in Dead Rails is a key resource that powers your train during missions and free runs. Each engine consumes fuel as it moves, so keeping an eye on the gauge is necessary to avoid running out mid-route. Different fuel types can affect your train’s performance, including speed and distance before a refill is needed. Players can gather or purchase more fuel through gameplay, ensuring their trains stay active during longer sessions.
In Dead Rails, fuel acts as a powerful source for the train that can help you escape to Mexico. Placing an item that can be used as fuel inside the train’s engine furnace will increase the gauge meter, depending on the source’s power. As such, anything that can be burned to keep your train’s engine chugging is fuel.
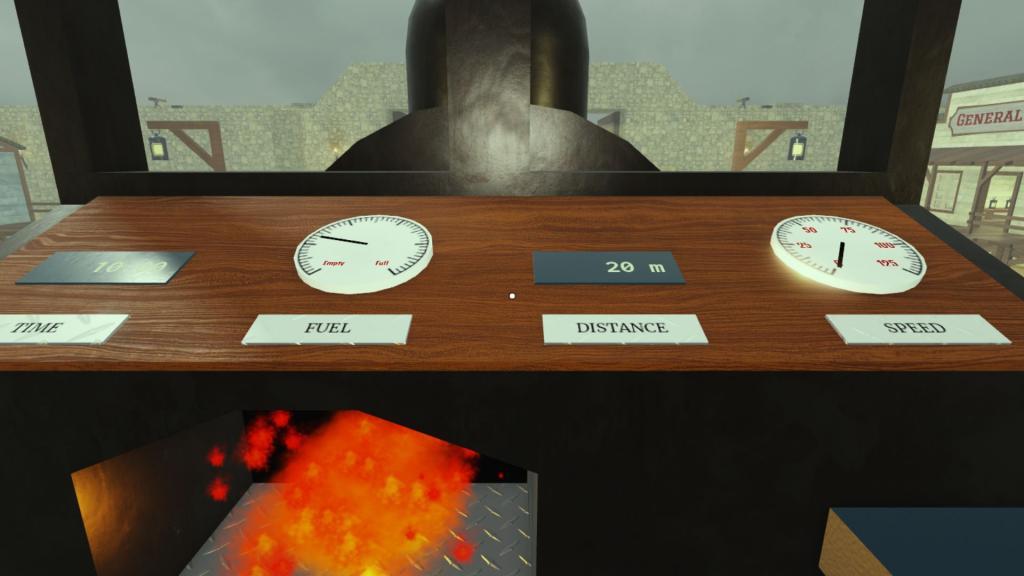
Dead Rail fuel items will be marked with a nice ‘Fuel‘ tag along with other classes of what they are. The gauge meter can thereby indicate how far you can travel with the amount of fuel you have left. For instance, a little more than half of the fuel tank can help you travel 10,000 meters (the next checkpoint) if you run at full speed without stopping.
What Items Can Be Used as Fuel in Dead Rails
Different materials can serve as fuel in Dead Rails, each providing varying burn times and energy output. Common fuel sources include coal, wood, and charcoal, which can be gathered from the environment or obtained through gameplay rewards. Players may also use refined or crafted fuels that last longer and power trains more consistently. Managing which items to burn helps balance fuel efficiency and resource availability during longer rail operations.
Now, it should strike you what to use and how efficient a particular resource is as a fuel. As we mentioned, in Dead Rails, it can be anything with the ‘Fuel’ tag, excluding valuables like gold and silver, ammunition, armor, and other defensive materials.
For instance, you can use corpses of the in-game creatures like Zombies, Werewolves, Dead Rails horses, or junk items like chairs, books, wheels as fuel. The most efficient resource is coal, as it’s readily available and bumps up the fuel meter by a decent amount.
Another major fuel resource is Nikola Tesla’s corpse, as it can completely fill up the meter. However, his body can only be found at the last checkpoint, so currently, it’s not much use as fuel. That said, here is the list of all items you can use as fuel in Dead Rails, along with the distance they can take you.
| Fuel Source | Fuel Value (out of 50) | Distance (in meters) |
|---|---|---|
| Nikola Tesla | 41 | 13350 |
| Coal | 13 | 4225 |
| Barrel | 6 | 1950 |
| Chair, Werewolf | 5 | 1625 |
| Rope, Wooden Painting | 4 | 1300 |
| Book, Wheel | 3 | 975 |
| Tumbleweed, Skeleton, Unicorn, Horse, Zombies, Wolf, Outlaw, Vampire | 2 | 650 |
| Newspaper, Wanted Poster | 1 | 325 |
Note that the distance values are valid once the train gains momentum, so you may travel a few meters less if you start from a speed of 0.
Also Read: How to Loot The Castle in Dead Rails
How to Manage Fuel in Dead Rails
Managing fuel in Dead Rails requires careful planning to avoid running out during missions. Keep an eye on your fuel gauge and refill at stations whenever you pass by them, even if the tank isn’t empty. Avoid unnecessary acceleration or extended idling, as these quickly drain fuel. Some routes have shortcuts or downhill slopes that help conserve it, so learn the map and use terrain wisely. Carry spare fuel containers if the game allows, which can save time during long runs or away from refuel points.
1. Use Classes in Dead Rails
You will find the Tailor in the Lobby who can help you buy the best Dead Rails classes. Here, the Miner and the Conductor classes are efficient in managing fuel. The former spawns with two pieces of coal and can mine the Coal ores faster than any other class. While the latter spawns with the same items and can run the train at 30% faster speed.
This can help you complete the entire 80 km journey using just 16 pieces of coal at a cost of $ 320. Whereas all other classes will require you to have 19 pieces at 380 cash to reach the last checkpoint.
2. Use the Best Items
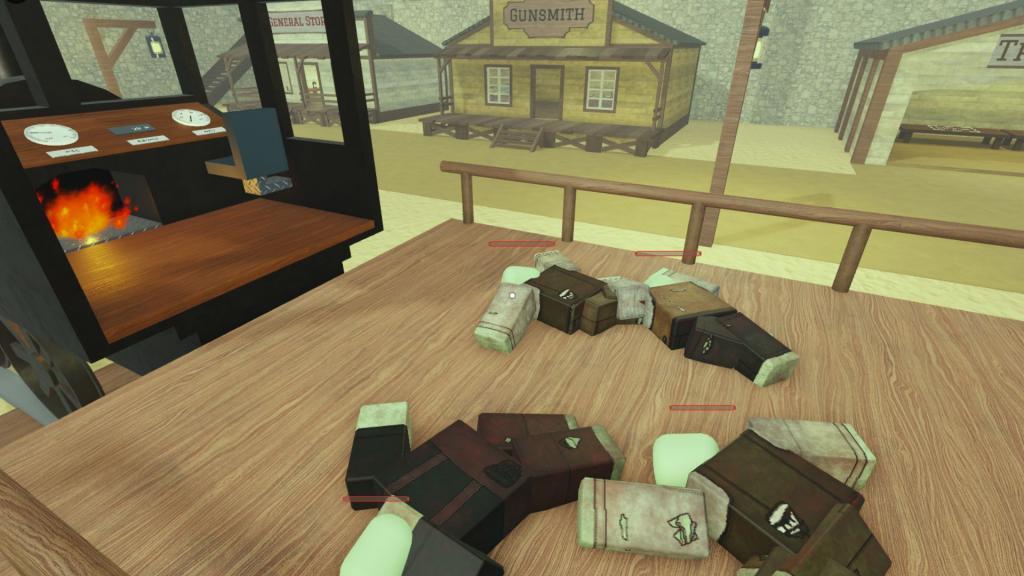
Now that you know what items can be used as fuel, you should always aim for filling up the meter using any sort of junk items or corpses you can find in the game, such as papers, chairs, wheels, and barrels. Here is the order in which you should prioritize using any item as a fuel source:
- Corpses: Zombies, Skeletons, Wolves, and Horses. Honestly, there’s no use in these things, and hence, throw them in the furnace first.
- Junk Items: Newspapers, Wanted Posters, Tumbleweed, books, wheels, rope, paintings, chair, barrels. These won’t sell for much and therefore should always be used as fuel.
- Coal: Coal gives you a huge bump in the fuel meter. However, it costs money to buy, and the ores are quite rare. So use coal when your fuel meter is completely out of range or when the above options are not accessible.
- High Value Corpses: These include Vampires, Outlaws, Werewolves, and Unicorns. Since you can sell these items for a decent amount of cash, it’s recommended to save them till the next checkpoint. However, if no other option is left, throw them in the furnace and save yourself.
How to Get Fuel in Dead Rails By Doing Nothing
The best way that I use to get fuel in Dead Rails is by staying at a checkpoint for a night or two. This way, as soon as night falls and monsters start spawning, the automatic turrets in the safe zone will instantly kill them, and I can then use the corpses.
Sometimes, I get lucky if there’s a Full Moon or a Blood Moon event. This way, I can stock up piles of Werewolf or Vampire corpses, sell them to make money, and finally buy coal or other essentials. There’s a full guide on all Dead Rails night events that you can refer to for better understanding.
Best fuel items ranked by value in Dead Rails
Top Fuel Items Ranked
Fuel items in Dead Rails are ranked by efficiency using fuel value out of 50 tank capacity and equivalent distance traveled (assuming momentum), prioritizing burn value over sell price for low-value junk. Coal dominates due to its high output despite scarcity, while corpses and junk fill gaps effectively. Rankings below group items by shared metrics from guides.
S-Tier (Highest Efficiency)
Nikola Tesla and Easter Bunny corpses provide 42/50 fuel (13-20 km distance), nearly filling the tank but found only at endgame spots like the last checkpoint.
Coal delivers 13/50 fuel (4.2 km), the best purchasable option at $80, ideal for long hauls once affordable.
A-Tier (Strong Mid-Fuel)
Barrels yield 6/50 (1.95 km); Chairs and Werewolf/Goliath/Lincoln’s Ghost corpses give 5/50 (1.6 km).
Ropes and Wooden Paintings offer 4/50 (1.3 km), common in buildings.
B-Tier (Reliable Filler)
Books and Wheels provide 3/50 (975 m), easy scavenges worth burning over $5 sell.
Tumbleweed, plus most corpses (Zombies, Wolves, Horses, Skeletons, Outlaws, Vampires, Unicorns) hit 2/50 (650 m); burn zombies freely since unsellable.
C-Tier (Last Resort)
Newspapers and Wanted Posters give 1/50 (325 m), least efficient-prefer selling equivalents for coal conversion.
Value Tips
Burn junk under 4 fuel units only if desperate, as selling 4 covers one coal’s power; save high-sell like Unicorns ($250) or Werewolves ($20) unless critical. Farm zombies overnight for infinite low-tier supply.
Which items give the most fuel per dollar spent
Coal offers the best fuel per dollar spent in Dead Rails, providing 13/50 tank capacity (4.2 km distance) for $80 at stores, yielding about 0.1625 fuel units per dollar.
Scavenged items like barrels (6/50 fuel, $0 cost if free) top free options, but for purchased equivalents, coal edges out alternatives since low-value junk isn’t buyable.
Free farmables like zombie corpses (2/50 fuel, $0) yield infinite value per dollar (undefined ratio), making them superior for zero-spend efficiency.
Efficiency Rankings
Rankings calculate fuel units per $1 (tank capacity / sell price), favoring burn over sell for junk:
| Item | Fuel Value | Sell Price | Fuel per $1 | Notes |
|---|---|---|---|---|
| Coal | 13/50 | $80 | 0.1625 | Purchased king; scalable |
| Barrel | 6/50 | $15 | 0.40 | Scavenge > buy equivalent |
| Chair | 5/50 | $10 | 0.50 | Common free burn |
| Zombie Corpse | 2/50 | $0 | Infinite | Overnight farm |
| Newspaper | 1/50 | $1 | 1.00 | Sell unless desperate |
Optimization Tips
Prioritize coal buys post-$80 cash milestone; farm corpses for zero-cost fuel to stretch dollars further. Avoid burning high-sell items like unicorns ($250 for 2/50)-their ratio (0.008) wastes potential coal purchases. Conductor class boosts all ratios by 25% fuel efficiency.
