Tired of empty villages and grinding for trades? Learn how to build a self-sustaining villager breeder that keeps your farms humming and your trading halls busy with fresh recruits.
So, that’s why we’ll be showing you how you can make a villager breeder in Minecraft, an automatic farm that can produce villagers without you having to do a thing.
Required Resources to Make a Villager Breeder in Minecraft
To build a villager breeder, you need several resources including beds, food items like bread, carrots, potatoes, or beetroots, and blocks to create a secure structure. At least three beds are required-two for the villagers who will breed and one for the new villager. Doors are no longer necessary in recent versions, but proper lighting and protection from hostile mobs are important. You’ll also need a way to transport villagers, such as minecarts or boats, to bring them into the breeder safely.
The villager breeder farm we’ll be making today is quite cheap and requires items and blocks you can easily obtain in the early game. Here are all the resources you’ll need:
- 2 Villagers
- 1 Composter
- 3 Beds
- 2 Stacks of Carrots or Potatoes (or more)
- 27 Trapdoors
- 3 Water Buckets
- 80 Dirt Blocks
- 1 Stone Hoe or Better
- 1 Full Light Source Block (like jack o’lantern, sea lantern or froglight)
- Building Blocks
- Glass Blocks (optional)
- Minecarts (optional)
- Boats (optional)
Minecraft Villager Breeder Ideal Location
This farm is designed to produce villagers, so you cannot place it near already existing villagers. They will claim the beds that we’ll place on the farm, and the breeder won’t function properly. So, don’t build it in a village or too close to a village or villager trading hall. Besides that rule, you are free to place it in any Minecraft biome, as well as underground or in the sky.
How to Make a Minecraft Villager Breeder
To make a Minecraft villager breeder, build a small enclosed area with at least two beds and give villagers enough space to move freely. Add extra beds for new villagers to spawn and place composters or other job blocks to assign professions. Provide a steady supply of food, such as bread, carrots, or potatoes, so villagers enter “willing” mode and begin breeding. Ensure the area is well-lit to prevent hostile mobs from interfering, and keep it near your base for easy access.
When you collect the needed basic items, let’s see how you can make a villager breeder. Follow the steps below to do so:
Villager Crop Farm
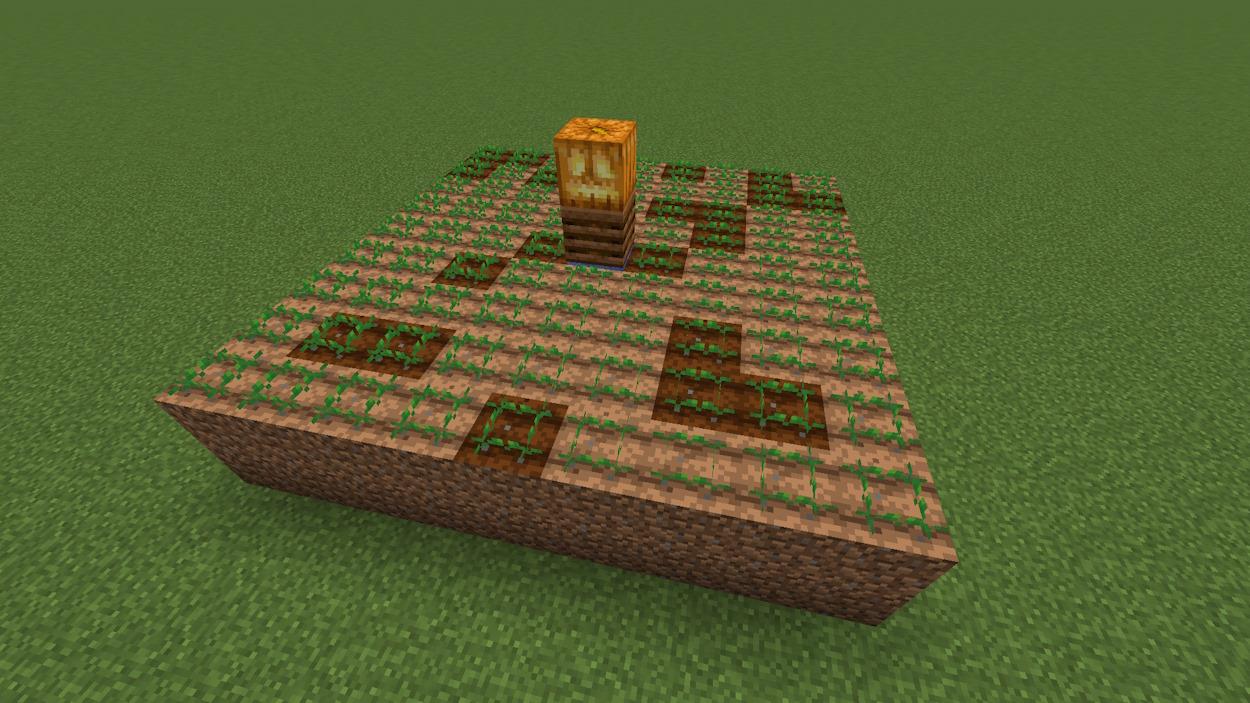
- Let’s start by making a crop farm. First, place a water source block embedded in the ground and then till the dirt blocks in a 9×9 square around the water source. This will require at least 1 stone hoe or better and 80 dirt blocks if the dirt wasn’t already there.
- Next, place a composter above the water source block with the help of a temporary block.
- Remove the temporary block, till the dirt block that the temporary block created, and place the full light source block above the composter.
- Then, take the carrots or potatoes and plant them. If you’re building the farm underground, ensure the crops get enough light by providing more light-emitting blocks like torches.
- Now, let’s make at least a 2-block-tall wall around the crop farm on three sides, leaving one side open. You can use glass blocks for this, as they’ll let you monitor the farm. You can also use any other building block that you want. The ceiling is unnecessary if you’re building the farm on the surface.
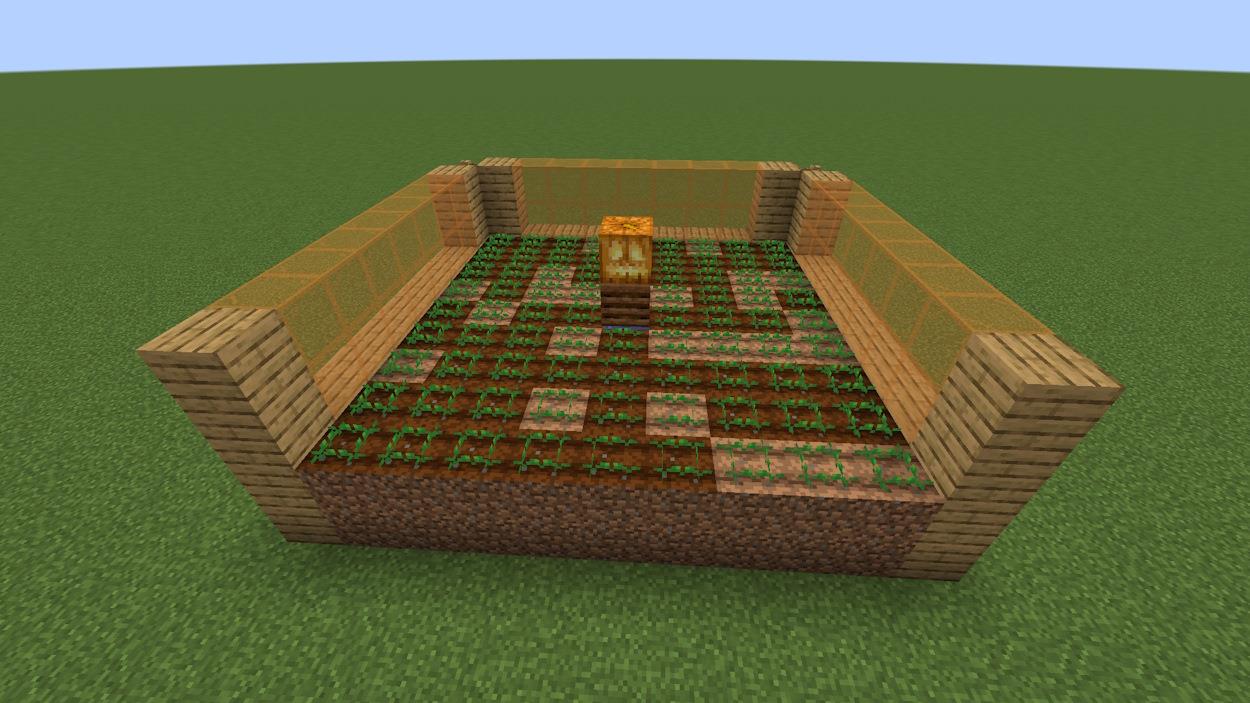
- The villagers will live on this crop farm, so it’s essential you make it safe. Light up the surroundings and make it inaccessible for zombies.
Also Read: How to Breed Villagers in Minecraft: A Step-by-Step Guide
Bed-Holding Platform
- The next step is to create a different section of the farm that will only hold three beds. First of all, place 9 trapdoors attached to the tilled dirt blocks on the side that doesn’t have a wall.
- Then, crouch and start placing temporary blocks attached to those trapdoors going away from the farm.
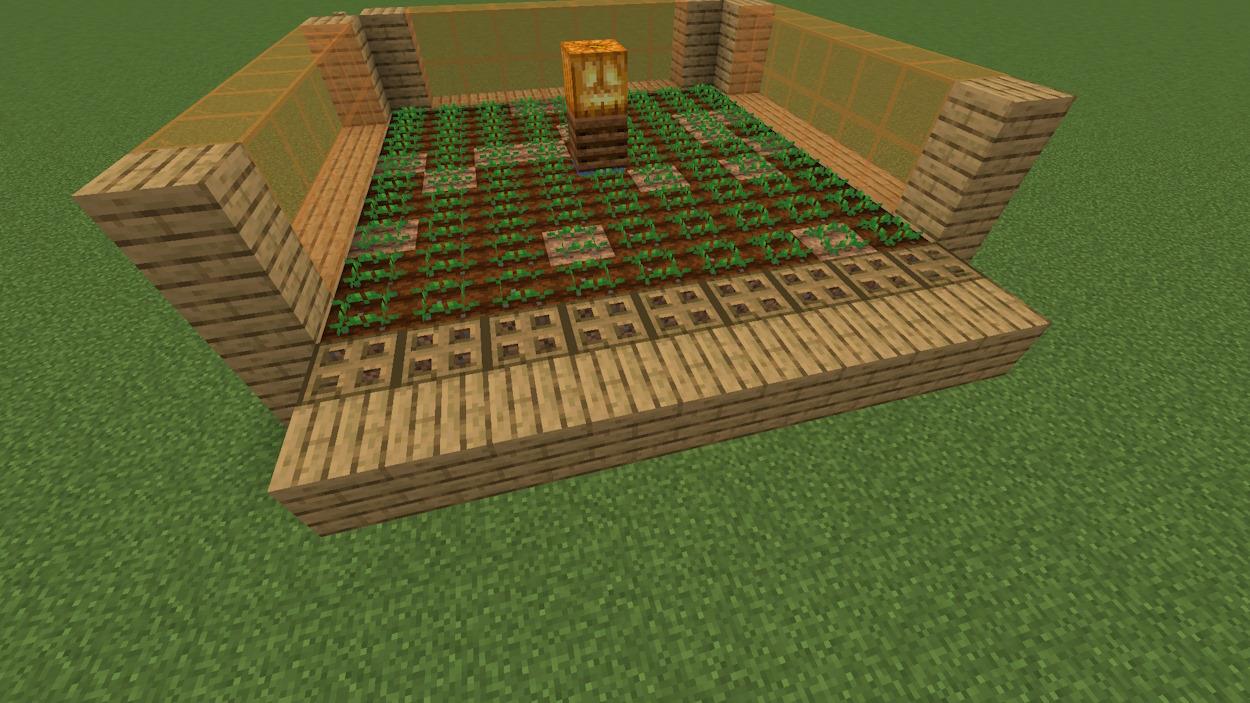
- Now, create a platform attached to the temporary blocks that the beds will rest on. It doesn’t have to be big at all. We’ll create a 9×4 block platform.
- Then, let’s remove the nine temporary blocks that are attached to the trapdoors.
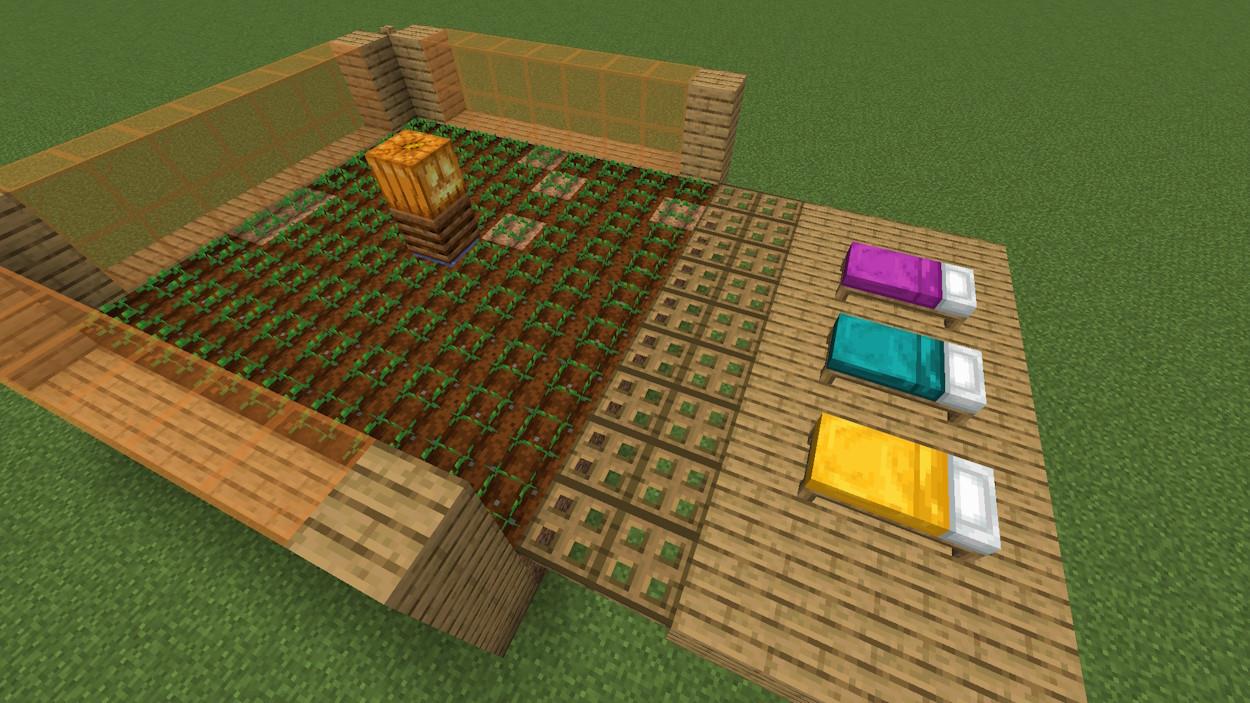
- Place nine more trapdoors attached to the edge of the bed platform, which will be connected to the first nine trapdoors. Make sure they are all at the top half part of the block.
- Finally, take the three beds and place them on the platform. Even though the villagers will never physically reach this platform, do light it up a bit so the hostile mobs don’t spawn.
Villager Water Stream
- Now that we’ve got the two sections of the farm in place let’s start constructing the third and final one – a water stream that will catch the baby villagers and transport them away from the farm.
- First things first, let’s finish placing the trapdoors. The last nine trapdoors should be one block above the trapdoors attached to the tilled soil. They need to be placed on the top half of the block so that the player can barely pass underneath them.
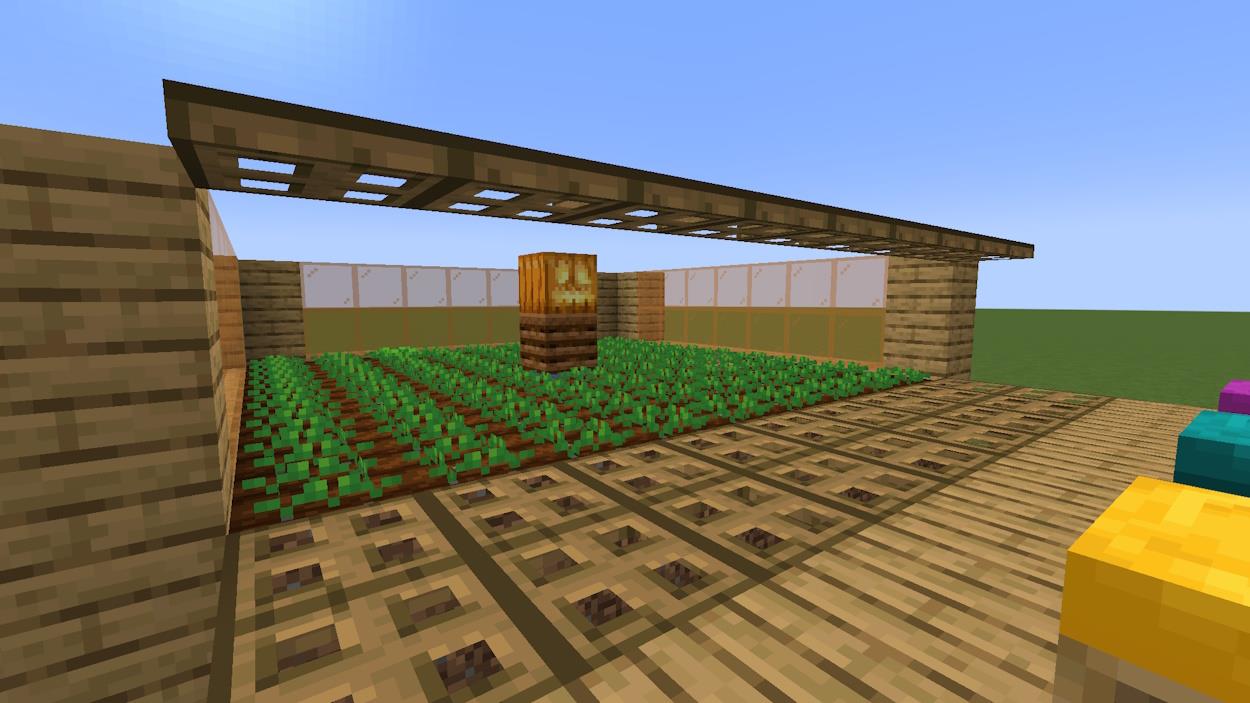
- Now, right-click the 18 trapdoors embedded in the floor to open them. They will smoothly align with the blocks, creating a hole between them. Leave the trapdoors above the player’s head as they are.
- Now, dig out the hole right below the trapdoors so that it’s two blocks deep.
- Go ahead and choose one side of this hole and make a wall there. The wall should not go under the trapdoors but beside them.
- Make sure that the hole is walled off on all sides, except on the one that is opposite from the wall you just built.
- Now, place water source blocks attached to the bottom blocks of the wall inside the hole.
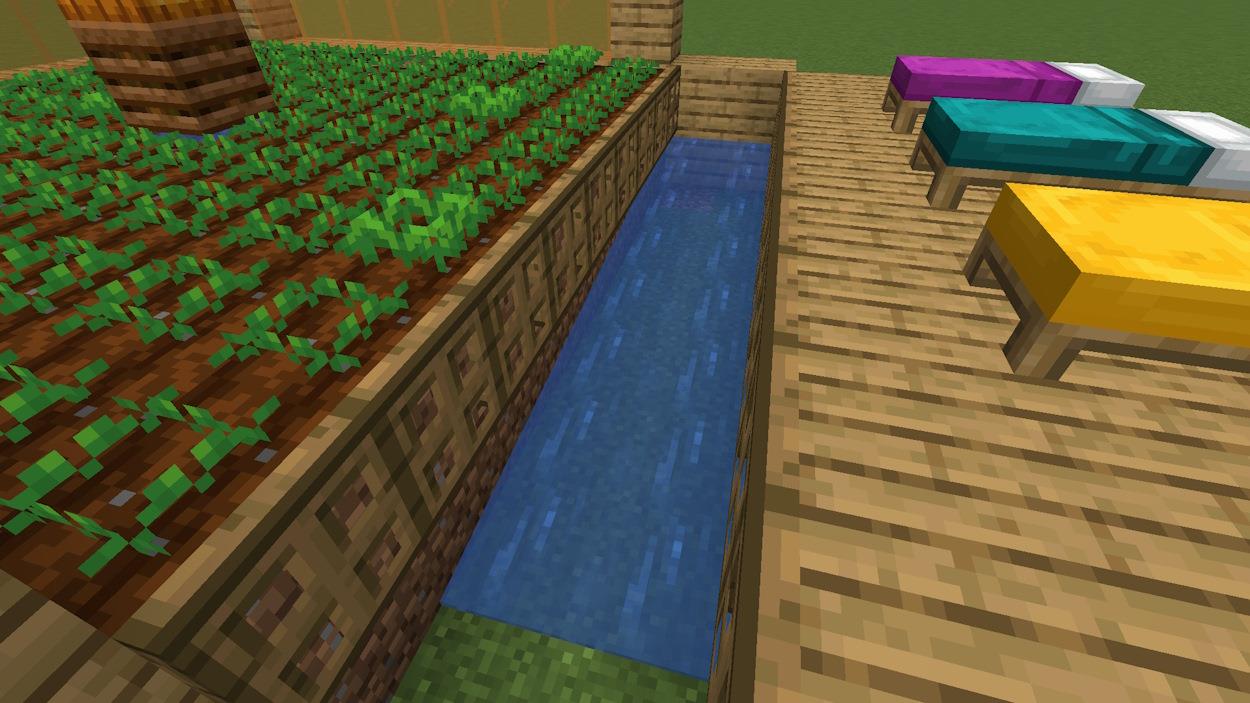
- As you’ll soon notice, the water stops flowing after eight blocks, so we’ll need to extend the hole both in-depth and in length.
- First, continue building the walls of this hole toward the side you left open. Alternatively, if you’re building the farm on the existing ground, dig out more of the terrain to extend the hole. The hole should be about 20 blocks long from the water source block you placed.
- Let the water flow further by dipping down one block every eight blocks. So, the hole should be two blocks deep for the first seven blocks, then three blocks deep for another seven blocks, and finally, it should be four blocks deep for the remaining six blocks.
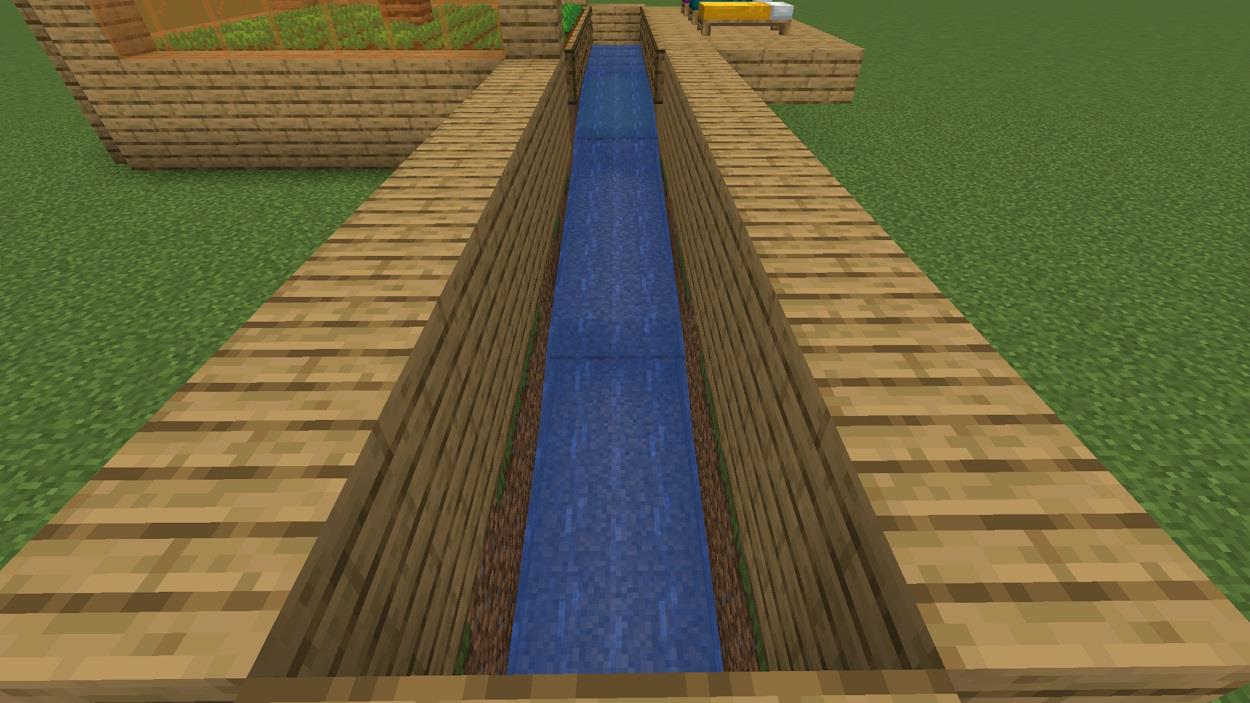
- And that’s pretty much it. All that’s left to do is to move two villagers to the crop farm we built. You may use minecarts or boats for this task or even workstation blocks or beds to lure the villagers toward the farm.
- If you’ve got extra crops on you, you can manually give them to the villagers. This will kick-start the farm until the crops have grown.
- In addition, make sure that no hostile mobs can get inside the water stream. You can build a roof over it or light up the surroundings. Moreover, since villagers will turn into witches upon getting struck by lightning, place a lightning rod nearby.
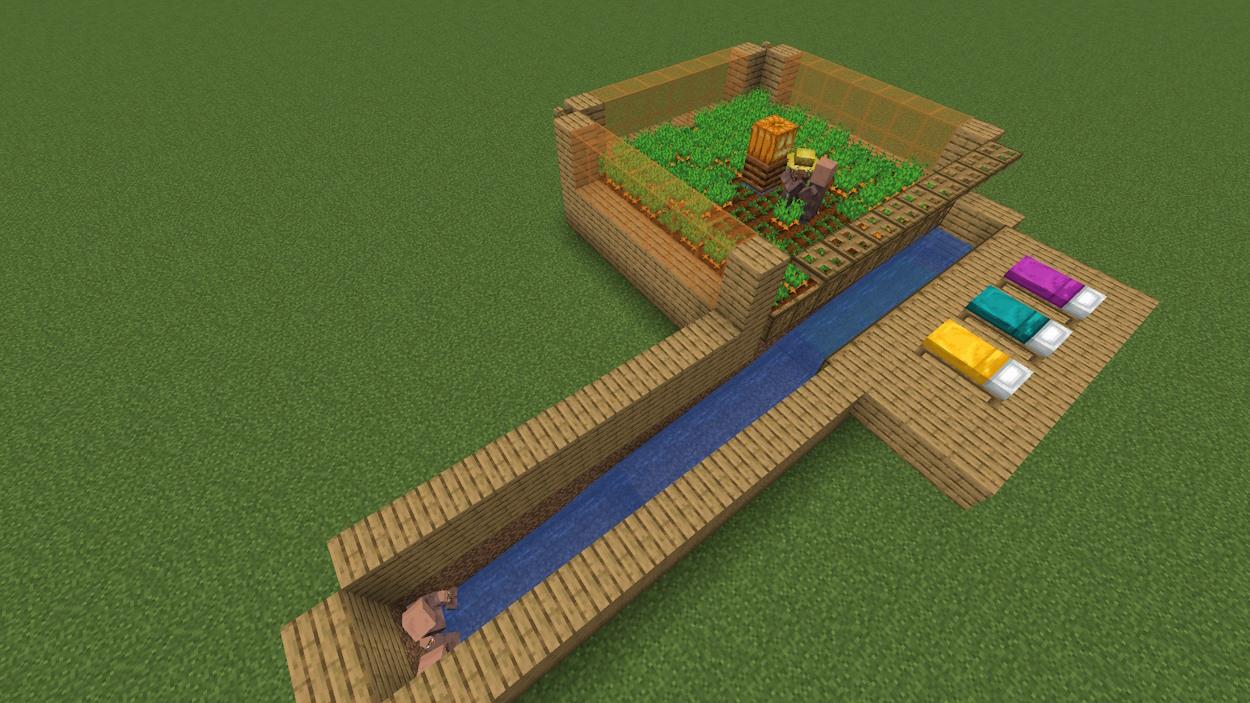
- At one point, this farm will produce a sufficient number of villagers, and more of them will only start to make your world lag. So, to disable the farm, you can break one of the three beds on the platform. Alternatively, you can block the passageway baby villagers take to fall into the hole. This will block the adult villagers’ line of sight to the beds and disable the farm.
- Furthermore, you are free to decorate the farm however you’d like, but make sure the hole stays open, and the villagers’ line of sight toward the beds stays unobstructed. After the villagers grow up, you can move them by minecarts or boats to an iron farm, trading hall or anywhere else.
How the Minecraft Villager Breeder Works
Villagers breed when they have enough food and beds nearby. Players toss bread, carrots, potatoes, or beetroots to two willing adults until their hearts appear. A baby villager spawns if an unclaimed bed exists within about eight blocks, and the parents regain willingness after roughly twenty minutes. This cycle repeats automatically in a confined area with ample supplies, producing new villagers for trading or expansion. Keep the space dark and zombie-free to prevent interruptions.
If you followed the steps above and already made your villager breeder in Minecraft, you can now find out how it actually works.
The crop farm we created provides a constant flow of food that the farmer villager collects, replant, and share with the other villagers. This process has, therefore, been automated, so you don’t need to check the villagers and throw food at them constantly. Moreover, the block above the composter stops the villagers from jumping and ruining the crops below. It’s also a light source block that provides light to the crops and allows them to grow, even if you’ve built the farm underground. Also Read: 7 Best Minecraft Cottage Ideas
The beds are the other requirement for breeding villagers. Villagers always try to fill every empty bed in the surroundings with new villagers. So, if there are two villagers and three beds, they will constantly try to breed. But we made it so they could not reach the beds, and that was done purposely because of the baby villagers. These little mobs will try to find the path to the nearest bed, where they can jump up and down.
The trapdoor placement was quite crucial for this design. The ones right above the player’s head actually stop the villagers from escaping. Because villagers are just a bit taller than the player, they cannot pass underneath them, nor can they crouch. However, there is plenty of space for a baby villager to pass. Furthermore, the trapdoors above the hole make the baby villagers’ AI think they can walk over them, which lets them fall safely into the hole below.
The water stream transports the villagers further, so they cannot claim the bed on the platform. This allows the two adult villagers on the farm to continue breeding. In addition, you can put the villagers that the farm produced in boats and minecarts and transport them to a new location.
Overall, this is a very simple farm that works efficiently and automatically. The community came up with plenty of different villager breeder designs. Many of them use the exact same mechanics we covered in this guide, like the three farms from Voltrox, BlazeDude, and LogicalGeekBoy.
Show step-by-step build for a compact villager breeder in Minecraft 1.21
Compact villager breeders in Minecraft 1.21 automate breeding using a farmer, beds, food, and collection rails for efficiency. Popular designs like those from LogicalGeekBoy or simple glass-box setups produce 2-8 babies per hour.
Materials List
Gather these for a compact 5x5x4 design (Java/Bedrock compatible):
-
144 building blocks (glass preferred for visibility)
-
80 dirt + hoe + carrots/potatoes
-
4 beds
-
3-4 trapdoors
-
1 composter
-
2 water buckets
-
2 villagers
-
Rails: 4 regular, 2 powered
-
1 dispenser + hopper + chest
-
1 sign, 1 lever/button, torches
Step 1: Build Crop Farm
Dig a 9×9 area with water in the center (2 blocks deep). Hoe all dirt around it, plant carrots, place composter nearby. Enclose 2 blocks high with glass/building blocks. Add farmer villager (trapdoor access).
Step 2: Breeder Chamber
Above the farm (head level), place 2 beds side-by-side with trapdoors over paths to restrict movement. Add 2 extra beds below for claiming. Use slabs/fence in center to separate; carpets guide villagers.
Step 3: Redstone & Collection
Dig under beds for V-shaped rail (powered rail + detector rail funneling to dispenser/hopper chest for food). Add water streams or minecarts to sweep babies/adults to collection point. Lever activates dispenser for food.
Step 4: Add Villagers & Activate
Transport 2 adults via minecart/boat to beds. Ensure 3+ beds total, light up (torches), spawn-proof. Feed via dispenser; babies drop to rails. Trade with breeders if needed for willingness.
Materials list for compact villager breeder in Minecraft 1.21
Compact villager breeders in Minecraft 1.21 require basic materials for a small farm, beds, and automation components. Popular compact designs (like 5×5 or smaller) use glass for visibility and work in both Java and Bedrock editions.
Core Materials
These lists draw from efficient, verified tutorials for 1.21 designs producing 2-8 babies/hour:
-
Building: 12-144 glass panes/blocks (or any solid block), 4 slabs, 1 fence.
-
Beds: 3-4 beds (essential for breeding and claiming).
-
Trapdoors/Carpets: 3-4 trapdoors, 4 carpets (for villager pathing).
-
Farm: 80 dirt/hoe, 80 carrots/potatoes/beetroot (or 9+ stacks bread), 1 composter, 2 water buckets.
-
Villagers: 2 adult villagers to start.
-
Redstone/Automation: 1-2 dispensers, 1 hopper/chest/barrel, 1 lever/button, 3-6 rails, 1 minecart, 1 sign.
Design Variations
| Design Source | Key Additions | Size/Notes |
|---|---|---|
| Simple Glass Box | Plenty food stacks | Ultra-compact (12 glass) |
| Crop Farm w/ Rails | 2 temporary blocks | 5x5x4, auto-collection |
| High-Yield Expansion | 4 torches, 1 leaves, 3 water buckets | 8/hour, expandable |
Usage Notes
Stock dispensers with bread (3 points each) or carrots; trade once with breeders for willingness if needed. Light up fully and spawn-proof to avoid issues.
